With recognition to:
http://quiltnqueen.blogspot.com/2012/05/2-sided-bindingtutorial.html?showComment=1433779245078#c3055306455547722967
...for most of the quilts I cut a scant 2.5" binding strip and sew a 3/8" seam allowance when attaching the binding to my quilt sandwich, with that in mind lets begin...
- Cut the binding strip you want to show on the quilt back 1-7/8" wide.
- Join as many strips by piecing them on the 45 degree to make a continuous long strip measuring at least 18 inches longer than the outside edges of your quilt.
- Press the 45 degree seams open.
- Cut the binding strip that you want to see on the front of the quilt a scant 1" strip.
- Join your front strips using the same method as you joined the back strips, making a long continuous strip the same length as the back binding strip.
- Press the 45 degree seams open.
- Stitch the front binding strip to the back binding strip, right sides together stitching 1/4" seam along the long edge, keeping the edges even.
- Set the long seam and press seam to the dark or to the fabric used for the front if both front and back are the same value. The binding should now measure a scant 2-3/8".
- Now press the binding as you would normally press... with wrong sides together...keeping the long raw edges even.
- The top strip shows the right side of the binding, the bottom strip shows the back of the binding strip
- Place the binding with the front (red) binding against the front of the quilt sandwich, make sure the raw edges of the binding are even with the raw edges of the quilt sandwich. Stitch 3/8" seam allowance.
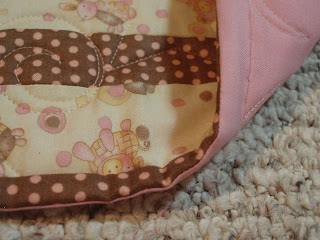
- Shown below is the front of the quilt with the binding stitched on. I always press the binding from the right side of the quilt with the right side of the binding face up before I flip the binding to the back and hand stitch down.....I pin my binding around the whole quilt before I start to hand stitch. I pin my 4 corners first. I place 1 pin about 1" from each side of the corner and adjust the corner to a perfect miter and pin .
- Please keep in mind if the border has stars or flying geese, you will cut the points off if your seam allowance is greater than 1/4".


Geen opmerkings nie:
Plaas 'n opmerking