Dinsdag 01 Desember 2015
Saterdag 07 November 2015
Woensdag 30 September 2015
Patterns by Karen H
A free pattern...
Click on this link to read more about Karen H -
http://faeriesandfibres.blogspot.co.za/p/patterns.html

http://faeriesandfibres.blogspot.co.za/p/patterns.html

..use your scraps, making fabric rope/twine!

Maandag 14 September 2015

Woensdag 02 September 2015
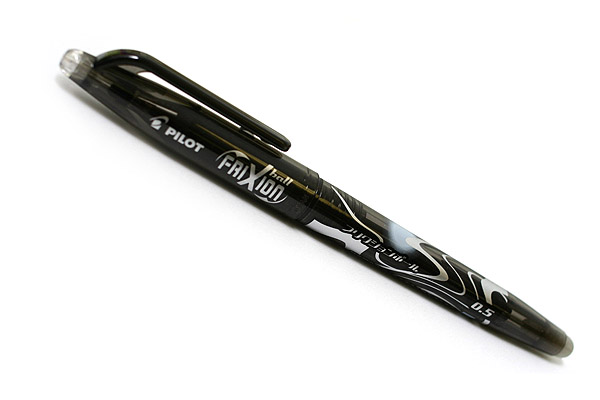
Frixion Pens-All you need to know
http://quiltskipper.com/2015/08/13/frixion-pens-all-you-need-to-know/


Maandag 10 Augustus 2015
Donderdag 06 Augustus 2015
Maandag 29 Junie 2015

Woensdag 24 Junie 2015
Music - God Only Knows - featuring Pharrell Williams, One Direction & many more
Take a look at this new version of the Beach Boys' classic track God Only Knows - featuring Pharrell Williams, One Direction & many more. http://bbc.in/ZQqE32It's been put together by the BBC to launch a new initiative - BBC Music. #LoveBBCMusic
Posted by BBC News on Tuesday, October 7, 2014
">
">
Take a look at this new version of the Beach Boys' classic track God Only Knows - featuring Pharrell Williams, One Direction & many more. http://bbc.in/ZQqE32It's been put together by the BBC to launch a new initiative - BBC Music. #LoveBBCMusic
Posted by BBC News on Tuesday, October 7, 2014
Vrydag 19 Junie 2015
Maandag 08 Junie 2015
A 2 sided binding....tutorial by http://quiltnqueen.blogspot.com/
With recognition to:
http://quiltnqueen.blogspot.com/2012/05/2-sided-bindingtutorial.html?showComment=1433779245078#c3055306455547722967
...for most of the quilts I cut a scant 2.5" binding strip and sew a 3/8" seam allowance when attaching the binding to my quilt sandwich, with that in mind lets begin...
- Cut the binding strip you want to show on the quilt back 1-7/8" wide.
- Join as many strips by piecing them on the 45 degree to make a continuous long strip measuring at least 18 inches longer than the outside edges of your quilt.
- Press the 45 degree seams open.
- Cut the binding strip that you want to see on the front of the quilt a scant 1" strip.
- Join your front strips using the same method as you joined the back strips, making a long continuous strip the same length as the back binding strip.
- Press the 45 degree seams open.
- Stitch the front binding strip to the back binding strip, right sides together stitching 1/4" seam along the long edge, keeping the edges even.


- Set the long seam and press seam to the dark or to the fabric used for the front if both front and back are the same value. The binding should now measure a scant 2-3/8".

- Now press the binding as you would normally press... with wrong sides together...keeping the long raw edges even.

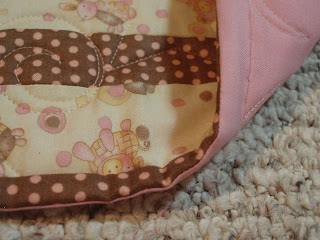
- The top strip shows the right side of the binding, the bottom strip shows the back of the binding strip
- Place the binding with the front (red) binding against the front of the quilt sandwich, make sure the raw edges of the binding are even with the raw edges of the quilt sandwich. Stitch 3/8" seam allowance.
- Shown below is the front of the quilt with the binding stitched on. I always press the binding from the right side of the quilt with the right side of the binding face up before I flip the binding to the back and hand stitch down.....I pin my binding around the whole quilt before I start to hand stitch. I pin my 4 corners first. I place 1 pin about 1" from each side of the corner and adjust the corner to a perfect miter and pin .
- Please keep in mind if the border has stars or flying geese, you will cut the points off if your seam allowance is greater than 1/4".
Maandag 02 Maart 2015
FreeSpirit Lookbook | Make It Coats

FreeSpirit Lookbook | Make It Coats
Click on link:
http://www.makeitcoats.com/en-us/discover/articles/quarter-one-freespirit-look-book
Maandag 23 Februarie 2015


Maandag 16 Februarie 2015
Million Little Stitches: How I make my Fiber Books
Million Little Stitches: How I make my Fiber Books: Here's the method I've devised to make the Take it Further Fiber Book and the two volumes of Take a Stitch Tuesday stitch sampler. ...
Vrydag 13 Februarie 2015

Donderdag 12 Februarie 2015
How to fold and store quilts
How to Fold and Store Quilts!
http://annfahl.blogspot.com.au/2012/02/how-to-fold-and-store-quilts.html
It's been quite awhile since I taught at a guild in Virginia. Before my lecture, I had dinner with about 6 women, and one of them mentioned how she folded and packed her quilts. She folded her quilts on the bias instead of the the straight of the grain. The bells and whistles went off in my brain--this was the answer on how to safely pack quilts when I teach and send them to exhibits. Of course it also works when quilts are stored in a closet somewhere.
Everyone loves "show and tell" at their quilt meetings, I've probably been to hundreds. I could just cry when someone opens up their quilt and there is a hard crease right down the middle in two directions. Once that crease is set, over time, it will never come out.
With the consent of that quilter in Virginia, I wrote and published a short article on folding forQuilter's Newsletter Magazine in the January 2006 issue. This little article has gotten more comments, feedback and requests to reprint in local newsletters, than anything I have ever written. So if you are tired of having heavy creases down the middle of your quilts, this is what you should do:


 If the package still needs to be made smaller, fold again much the same way. Or open it up and refold.
When you open up the quilt after it has been folded like this, the folds will soften and disappear in a very short time. Why? Because every fold that has been made is a soft one, the fibers aren't folded or crimped on top of each other--always at an angle.
All quilts should be folded on the bias, or rolled to prevent permanent creasing. I heartily recommend this method. When sending to a show, it will arrive without the big crease in the middle, it will look much better. The same goes for antique quilts, it may be too late to "save" some of them from heavy creasing because the damage has already been done. In general even old quilts will be happier folded this way.
Practice this a couple of times and you'll figure out how to do this. Even blankets and bedspreads can be folded and stored this way too. Go to your closet and find something to fold! You will be impressed.
 |
| One of Ann's quilts folded and ready to pack, ship or store in the closet |
With the consent of that quilter in Virginia, I wrote and published a short article on folding forQuilter's Newsletter Magazine in the January 2006 issue. This little article has gotten more comments, feedback and requests to reprint in local newsletters, than anything I have ever written. So if you are tired of having heavy creases down the middle of your quilts, this is what you should do:

Lay your quilt on a table, bed or on the floor. Fold one
corner across the quilt on the bias.

Fold up the next corner, the same way.
Fold the third corner, the same way.
Fold the third corner, the same way.

Then fold the last corner as shown.

The finished package should look something like this.

When you open up the quilt after it has been folded like this, the folds will soften and disappear in a very short time. Why? Because every fold that has been made is a soft one, the fibers aren't folded or crimped on top of each other--always at an angle.
All quilts should be folded on the bias, or rolled to prevent permanent creasing. I heartily recommend this method. When sending to a show, it will arrive without the big crease in the middle, it will look much better. The same goes for antique quilts, it may be too late to "save" some of them from heavy creasing because the damage has already been done. In general even old quilts will be happier folded this way.
Practice this a couple of times and you'll figure out how to do this. Even blankets and bedspreads can be folded and stored this way too. Go to your closet and find something to fold! You will be impressed.
http://annfahl.blogspot.com.au/2012/02/how-to-fold-and-store-quilts.html
Donderdag 05 Februarie 2015
FREE BOM 2015 - Art Nouveau from Morning Glory Designs

(Morning Glory Designs)

SUBSCRIBE TO THEIR NEWSLETTER AND RECEIVE YOUR BLOCK IN YOUR INBOX!
Here is how the Block of the Month program will work:
Each month I will post a free block on my blog and in my newsletter for 30 days. You may download and print out the block pattern once for your personal use only. Any other use requires permission.
If your friends want the block you are welcome to direct them to my blog to download a copy. You may NOT share your copy with them.
If you miss a block you may purchase it on my website for $5.50. This is how I make my living so please respect these guidelines. It is the only way I can afford to continue to offer free BOMs.
Subscribers to my newsletter will receive a BONUS BLOCK each month in the newsletter. It is available only to subscribers and only for 30 days. After 30 days the link will be closed and block removed. Bonus blocks will NOT be offered for sale. Do not share your bonus blocks with anyone. They are a gift for subscribing and reading my newsletter. Others who wish to receive them may subscribe to my newsletter and get their own bonus blocks.
Please let me know about broken or non-working links. However, email requests for past blocks OR issues of the newsletter and bonus blocks will not be honored.
Please update your browser to the newest version (I prefer Chrome) to ensure a successful download from BOX.com.
Only subscribers will receive the sashing, border and finishing instructions for free.
Maandag 02 Februarie 2015
Sofa pocket - crazy quilt
Ulla's Quilt World: Sofa pocket - crazy quilt: I have dyed the fabrics (silk, linen, cotton) by plants.
Dinsdag 06 Januarie 2015
Teken in op:
Plasings (Atom)

-
 Knersvlakte... ...die afgelope blomseisoen (Sept 2019) ry ek deur Vanhrynsdorp en besoek die plaaslike vetplantkwekery. Dit huisves ook...

